Halloween icebox cake has become my absolute favorite spooky celebration treat! I remember the first time I made a no-bake dessert like this; the simplicity and the incredible creamy texture blew me away. This particular recipe, with its vibrant orange hues and rich Oreo layers, is just pure fun for the taste buds. The way the cookies soften just enough, combined with the cool, sweet whipped cream, is pure magic. It’s truly an easy Halloween icebox cake that will impress everyone. Let’s get this spooky dessert assembled!
Why You’ll Love This Halloween Icebox Cake
This dessert is a total winner for so many reasons:
- It’s a fantastic no-bake Halloween icebox cake, meaning no oven required!
- The layers of creamy whipped cream and crunchy Oreos are absolutely divine.
- It’s incredibly easy to assemble, making it a perfect activity for a kid-friendly Halloween icebox cake.
- The vibrant orange colors are super festive and scream Halloween!
- It’s a crowd-pleaser that’s always a hit at any spooky gathering.
- You can prep it ahead, freeing you up to enjoy the party.
- The soft, cookie-crumb texture is pure dessert bliss.
Ingredients for Your Spooky Halloween Icebox Cake
Gathering these simple ingredients is the first step to creating your amazing Halloween icebox cake. You’ll be surprised at how few items are needed for such a decadent treat!
- 2 cups heavy whipping cream – make sure it’s nice and cold for whipping
- 1 teaspoon vanilla extract – adds that classic sweet flavor
- 3/4 cup powdered sugar – for just the right amount of sweetness and helps stabilize the cream
- 1 teaspoon orange gel food coloring – this is key for that festive Halloween look!
- 24 Oreo cookies – the foundation of our cookies and cream delight, essential for an Oreo Halloween icebox cake
- 1/2 cup orange icing – for that extra pop of color and flavor on top
- 1/2 cup sprinkles – choose Halloween-themed ones for the ultimate spooky presentation!
How to Make a No-Bake Halloween Icebox Cake
Let’s dive into the simple process of creating this fun and festive dessert! Follow these easy Halloween icebox cake instructions, and you’ll have a showstopper ready in no time.
- Step 1: Grab a 9-inch springform pan. I like to prep mine by lining the bottom and sides with plastic wrap or parchment paper. This makes removing the cake a breeze and keeps everything neat.
- Step 2: In a large, chilled mixing bowl, combine the 2 cups heavy whipping cream, 1 teaspoon vanilla extract, and 3/4 cup powdered sugar. Whip it all up with an electric mixer on medium-high speed until you get lovely stiff peaks – this is crucial for the cake’s structure.
- Step 3: Now for the fun part! Divide your whipped cream into three separate bowls. Add different amounts of the 1 teaspoon orange gel food coloring to each bowl. Gently fold the color in until you achieve those perfect, spooky shades of orange.
- Step 4: Start building your cake! Place a layer of 24 Oreo cookies right at the bottom of your prepared pan. Gently break some cookies to fill in any gaps for a solid base.
- Step 5: Spread one-third of your darkest orange whipped cream over the cookie layer. Smooth it out evenly with an offset spatula or the back of a spoon.
- Step 6: Add another layer of Oreos, followed by one-third of your next lightest orange whipped cream. Again, spread it evenly. This is really how to make Halloween icebox cake visually appealing.
- Step 7: Finish with one last layer of Oreos, then top it all off with the remaining whipped cream. Smooth the top surface so it looks polished.
- Step 8: Cover the pan tightly with plastic wrap. Pop it into the refrigerator for at least 6 hours, but I highly recommend chilling it overnight. This allows the flavors to meld and the cookies to soften beautifully.
- Step 9: Once it’s completely chilled, carefully remove the cake from the refrigerator. Release the sides of the springform pan and gently peel away the plastic wrap or parchment paper.
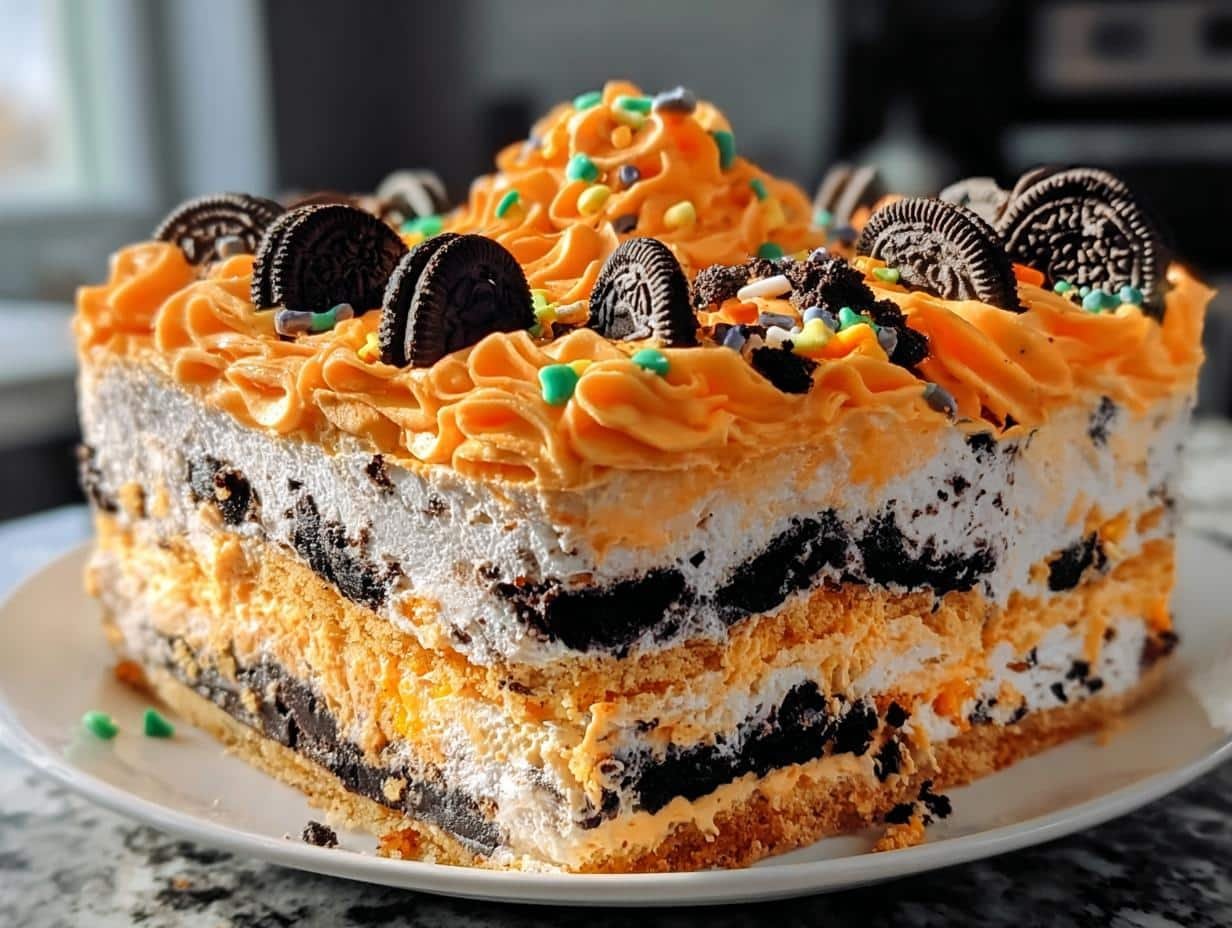
- Step 10: Time to decorate! Frost the top of your amazing Halloween icebox cake with the 1/2 cup orange icing and then sprinkle generously with your Halloween sprinkles.
Pro Tips for the Best Halloween Icebox Cake
I’ve learned a few tricks over the years that really elevate this dessert. Follow these tips for a truly show-stopping Halloween icebox cake:
- Always use very cold heavy whipping cream; it whips up much better and holds its shape.
- Don’t overmix the whipped cream once you’ve added the food coloring, or it might become too soft.
- Ensure your springform pan is properly lined. This makes unmolding so much easier and keeps the cake intact.
- Chill the cake for the full recommended time. This is crucial for the cookies to soften and the layers to set properly.
What’s the secret to a perfect Halloween Icebox Cake?
The magic lies in the quality of your whipped cream and the chilling time. Achieving stiff peaks ensures a stable, sliceable dessert, while ample chilling allows the Oreos to absorb moisture and create that wonderfully soft, cake-like texture for a truly creamy Halloween icebox cake.
Can I make this Halloween Icebox Cake ahead of time?
Absolutely! This is a fantastic make-ahead dessert. You can assemble the entire cake up to 24 hours in advance and keep it chilled in the refrigerator. Just add the final decorations before serving.
How do I avoid common mistakes with my Halloween Icebox Cake?
A common pitfall is not chilling the cake long enough, which can lead to a messy slice. Also, be careful not to over-whip the cream, as it can turn grainy. Lastly, ensure your pan is well-lined to prevent sticking.
Best Ways to Serve Your Halloween Party Icebox Cake
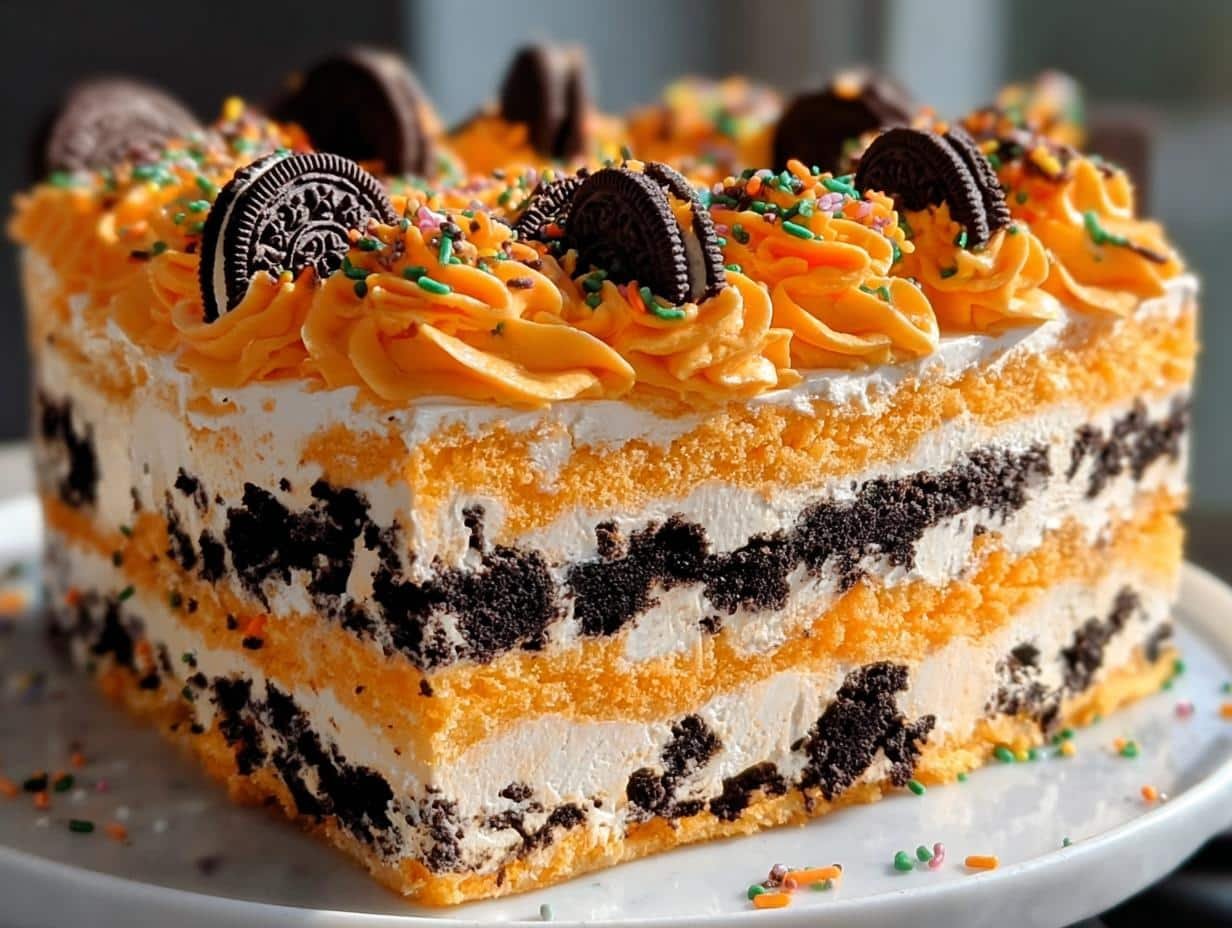
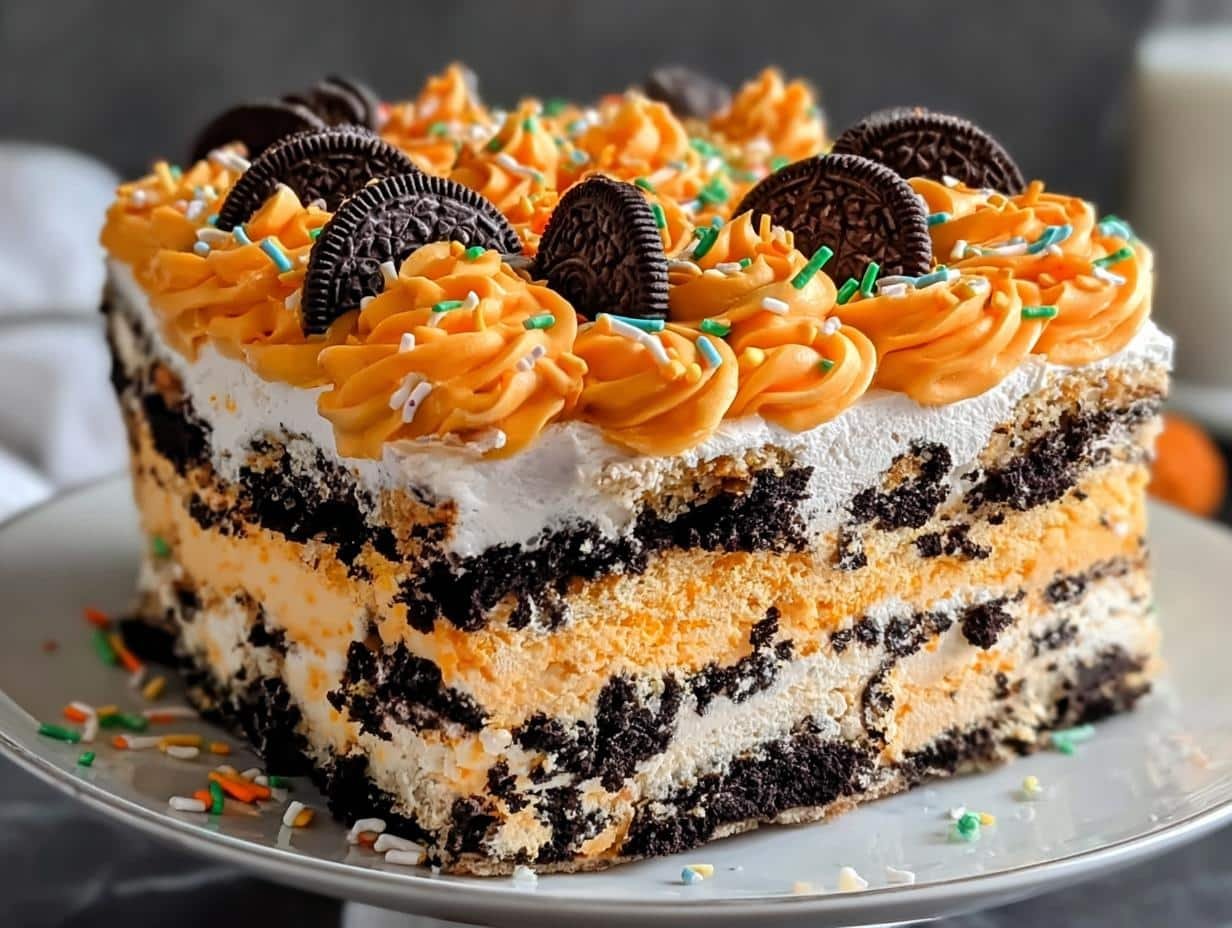
Once your beautiful Halloween icebox cake is ready, serving it is half the fun! For a festive presentation, I love to slice it using a warm, sharp knife – it cuts through those layers like a dream, revealing the spooky orange swirls inside. This delightful Halloween dessert icebox cake pairs wonderfully with a scoop of vanilla bean ice cream or a dollop of extra whipped cream on the side. You could also serve it with a small bowl of chocolate pudding for an extra layer of decadence, making it perfect for any Halloween party icebox cake spread.
Nutrition Facts for Your Halloween Icebox Cake
Here’s a look at the estimated nutritional breakdown per slice of this delicious Halloween icebox cake. It’s a fun treat perfect for your spooky celebrations!
- Calories: 350
- Fat: 20g
- Saturated Fat: 12g
- Protein: 3g
- Carbohydrates: 35g
- Fiber: 1g
- Sugar: 25g
- Sodium: 150mg
Nutritional values are estimates and may vary based on specific ingredients used.
How to Store and Reheat Your Halloween Icebox Cake
Once your amazing Halloween icebox cake is assembled and chilled, you’ll want to store it properly to keep it tasting its best. For optimal freshness, I always recommend a good storage-related secondary keyword like keeping it well-covered. If you have any leftovers, simply cover the cake tightly in the springform pan with plastic wrap or transfer it to an airtight container. It will stay delicious in the refrigerator for about 3 to 4 days. If you need to store it for longer, this cake freezes beautifully for up to 3 months!
When you’re ready to enjoy a slice from frozen, just transfer it to the refrigerator overnight to thaw gently. For a quick reheat, you can place a frozen slice on a plate and microwave it for about 10-15 seconds, just enough to take the chill off and soften it slightly. It’s a simple way to enjoy a piece of this spooky delight any time!
Frequently Asked Questions About This Halloween Icebox Cake Recipe
What is a Halloween icebox cake?
A Halloween icebox cake is a no-bake dessert that relies on chilling time for the cookies and cream layers to meld together, creating a soft, cake-like texture. It’s designed to be visually festive for the holiday, often featuring spooky colors like orange and black, or themed decorations.
Why make Halloween icebox cake instead of baking?
You should make Halloween icebox cake because it’s incredibly simple and requires no oven time, which is perfect for warmer weather or when you want a quick, easy dessert. The creamy, melt-in-your-mouth texture is also a delightful contrast to traditional baked cakes, and it’s a fun recipe for kids to help assemble.
Can I use different cookies for this Halloween icebox cake recipe?
Yes, you can certainly get creative! While this recipe calls for Oreos for a classic cookies-and-cream vibe, you could experiment with chocolate wafer cookies, graham crackers, or even vanilla cookies for a different flavor profile. Just ensure they are firm enough to hold up to the chilling process.
How do I get the best creamy texture in my Halloween icebox cake?
To achieve that perfect creamy Halloween icebox cake texture, make sure your heavy whipping cream is very cold before you whip it. Also, chilling the cake for at least 6 hours, or ideally overnight, is crucial. This allows the cookies to soften and absorb moisture from the cream, resulting in that signature smooth, melt-in-your-mouth consistency.
Variations of Halloween Icebox Cake You Can Try
While this recipe is fantastic as is, I love getting creative with desserts! If you’re looking for a different twist, consider these fun variations for your next spooky gathering. You can easily adapt this to suit your tastes or dietary needs, making it the best Halloween icebox cake for everyone.
- Chocolate Lover’s Dream: Swap the Oreos for chocolate wafer cookies and use chocolate whipped cream for an intense chocolatey experience.
- Peanut Butter Swirl: Gently swirl a few tablespoons of creamy peanut butter into your orange whipped cream layers for a delicious peanut butter and chocolate combination. This makes for a wonderfully rich orange Halloween icebox cake.
- Dietary Friendly: For a gluten-free option, use gluten-free chocolate sandwich cookies. You can also use a dairy-free whipped topping and plant-based cookies to make it vegan.
- Spiced Pumpkin Flavor: Add a teaspoon of pumpkin pie spice to your whipped cream and a touch of pumpkin puree for a fall-themed twist on the classic Halloween icebox cake with Oreos.
Halloween Icebox Cake: Divine Spooky Treat
A no-bake Halloween Icebox Cake made with layers of whipped cream and Oreo cookies, perfect for spooky celebrations with its festive orange colors.
- Prep Time: 30 minutes
- Cook Time: 0 minutes
- Total Time: 6 hours 30 minutes
- Yield: 12 slices 1x
- Category: Dessert
- Method: No-Bake
- Cuisine: American
- Diet: Vegetarian
Ingredients
- 2 cups heavy whipping cream
- 1 teaspoon vanilla extract
- 3/4 cup powdered sugar
- 1 teaspoon orange gel food coloring
- 24 Oreo cookies
- 1/2 cup orange icing
- 1/2 cup sprinkles
Instructions
- Prepare a 9-inch springform pan by lining the bottom and sides with plastic wrap or parchment paper.
- In a mixing bowl, combine heavy whipping cream, vanilla extract, and powdered sugar. Whip with an electric mixer until stiff peaks form.
- Divide the whipped cream into three bowls. Add varying amounts of orange gel food coloring to each bowl and gently fold to create different shades.
- Place a layer of Oreo cookies at the bottom of the prepared pan, filling any gaps with broken cookies.
- Spread one-third of the darkest orange whipped cream over the cookie layer, smoothing it evenly.
- Add another layer of Oreo cookies, followed by one-third of the second-lightest orange whipped cream, spreading evenly.
- Add a final layer of Oreo cookies and top with the remaining whipped cream, smoothing the top.
- Cover the pan securely with plastic wrap and refrigerate for at least 6 hours, or preferably overnight.
- Before serving, remove the cake from the refrigerator, release the springform pan sides, and peel away the lining.
- Decorate the top of the Halloween Icebox Cake with orange icing and sprinkles.
Notes
- For the best flavor and texture, serve the cake within the first day.
- Customize the shades of orange in the whipped cream for a more personalized festive appearance.
- Ensure the whipped cream reaches stiff peaks for proper cake structure.
- Chill the cake for at least 6 hours, or overnight, for clean slicing.
- Use a sharp, warm knife to slice the cake for a neat presentation.
Nutrition
- Serving Size: 1 slice
- Calories: 350
- Sugar: 25g
- Sodium: 150mg
- Fat: 20g
- Saturated Fat: 12g
- Unsaturated Fat: 8g
- Trans Fat: 0g
- Carbohydrates: 35g
- Fiber: 1g
- Protein: 3g
- Cholesterol: 40mg
