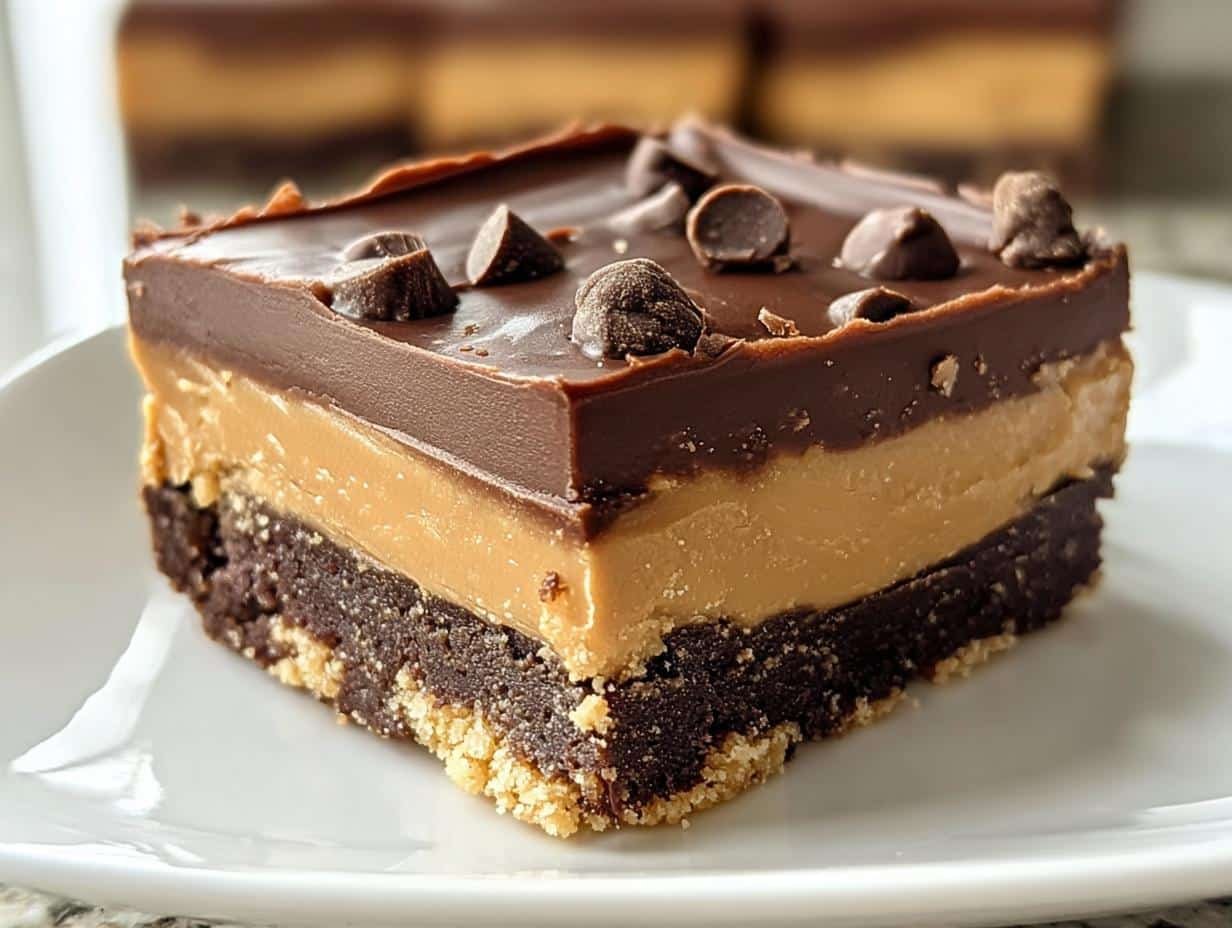
Chocolate Peanut Butter Dream bars are my absolute favorite way to satisfy that craving for something sweet and decadent. I remember the first time I tried making an easy Chocolate Peanut Butter Dream version; the aroma of melted chocolate and peanut butter filling my kitchen was pure bliss! These bars are a perfect harmony of rich, velvety chocolate and creamy, salty peanut butter, all nestled on a cookie crumb base. They truly are a taste of heaven, creating a memorable chocolate peanut butter dream dessert experience that everyone will adore. Let’s get cooking!
Why You’ll Love These Chocolate Peanut Butter Dream Bars
You’re going to adore these bars for so many reasons! They are:
- Incredibly delicious, offering a perfect balance of deep chocolate and smooth peanut butter flavors.
- Super easy to whip up, making them a fantastic option even on busy weeknights.
- A crowd-pleaser for all ages, ensuring happy smiles all around.
- Budget-friendly, using common pantry staples for a rich treat without breaking the bank.
- A joy to make, especially when you achieve that perfectly creamy Chocolate Peanut Butter Dream texture.
- A delightful way to enjoy a decadent creamy Chocolate Peanut Butter Dream dessert without much fuss.
- Family-friendly, perfect for baking with kids or sharing at gatherings.
- A guaranteed hit for anyone who loves the classic chocolate and peanut butter combo.
Ingredients for Chocolate Peanut Butter Dream Bars
Gather these simple ingredients for a truly magical Chocolate Peanut Butter Dream dessert experience. You’ll need 8 large chocolate chip cookies (about 5 inches across), which we’ll turn into a delicious crumb base – think of them as the foundation for your Chocolate Peanut Butter Dream cookies masterpiece. To bind those crumbs together, we’ll use 5 tablespoons melted butter. For that luscious middle layer, grab 3/4 cup creamy peanut butter and 1 1/2 cups powdered sugar. The powdered sugar helps create that wonderfully smooth, almost frosting-like texture essential for a creamy Chocolate Peanut Butter Dream. Finally, you’ll need 12 ounces semi-sweet chocolate chips (or milk chocolate chips), divided for two layers of chocolatey goodness. Using good quality chocolate really makes a difference in the final flavor of your rich Chocolate Peanut Butter Dream bars.
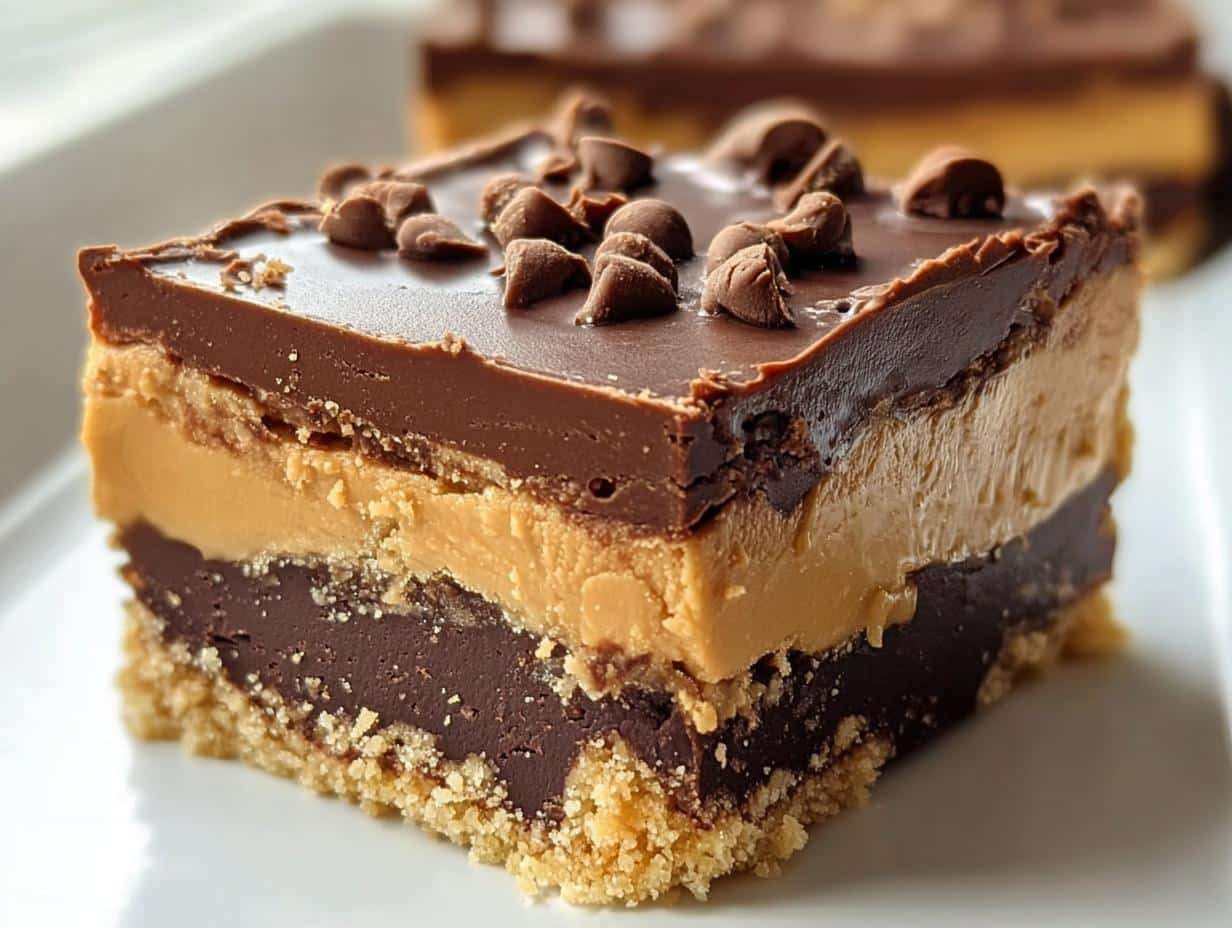
How to Make Chocolate Peanut Butter Dream Bars
- Step 1: Preheat your oven to a cozy 350°F (175°C). Prepare a 9×9 inch pan by lining it with parchment paper or greasing it lightly. This ensures your bars won’t stick.
- Step 2: Take your 8 large chocolate chip cookies and crumble them into fine crumbs in a medium mixing bowl. Think of it like making a delicious cookie sand! Then, add the 5 tablespoons melted butter and mix until the crumbs are evenly moistened and clump together.
- Step 3: Press this cookie mixture firmly and evenly into the bottom of your prepared pan. Make sure you get it into all the corners to create a solid base for your rich Chocolate Peanut Butter Dream.
- Step 4: Bake this crust for just 10 minutes, or until the edges start to look firm and slightly golden. Let it cool on the counter for about 10 minutes.
- Step 5: Now, pop the pan into the refrigerator for at least one hour. You want this crust to be completely cooled and set before adding the next layer. This chilling step is crucial for a clean separation of layers in your Chocolate Peanut Butter Dream bars.
- Step 6: While the crust chills, melt half of your 12 ounces semi-sweet chocolate chips. Do this in 30-second intervals in the microwave, stirring well between each burst. You’re aiming for a smooth, pourable chocolate.
- Step 7: Spread this melted chocolate evenly over the chilled crust. It should coat the cookie base beautifully. Return the pan to the refrigerator for another 15-20 minutes until this chocolate layer is firm to the touch.
- Step 8: In a separate bowl, mix the 3/4 cup creamy peanut butter with the 1 1/2 cups powdered sugar until it’s well combined and wonderfully smooth. This creates the luscious peanut butter filling for your rich Chocolate Peanut Butter Dream.
- Step 9: Carefully spread this smooth peanut butter mixture over the hardened chocolate layer. Try to get it as even as possible for a beautiful finish.
- Step 10: Melt the remaining chocolate chips using the same microwave method. Spread this final layer of melted chocolate over the peanut butter.
- Step 11: Allow your bars to set completely in the refrigerator, which might take another hour or so. Once firm, use a sharp knife dipped in hot water and wiped clean between cuts to slice them into 10 equal pieces. Enjoy your amazing Chocolate Peanut Butter Dream creation!
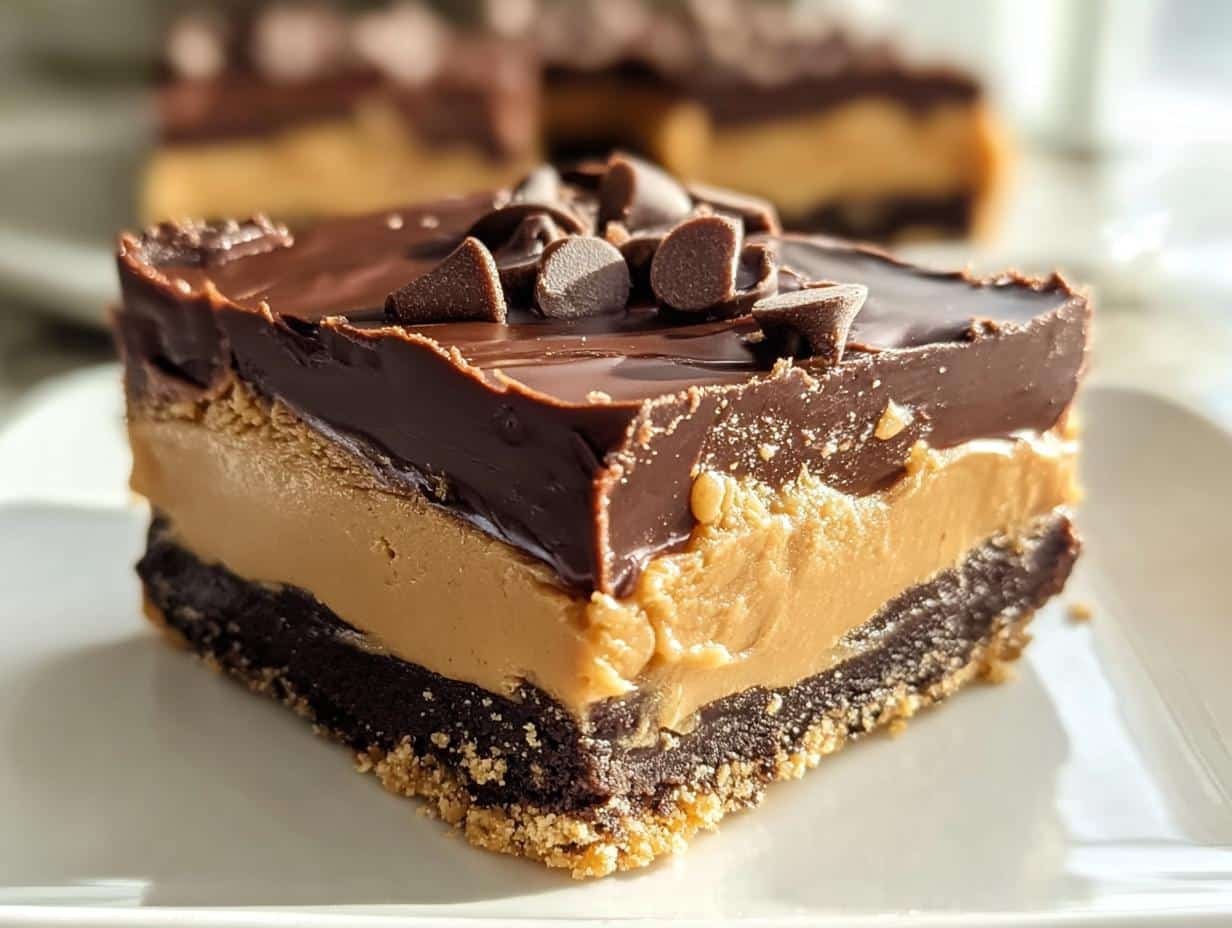
Pro Tips for the Best Chocolate Peanut Butter Dream Bars
Want to elevate your Chocolate Peanut Butter Dream bars from good to absolutely unforgettable? Here are a few tricks I’ve picked up:
- Use good quality chocolate chips for the best melt and flavor. It makes a huge difference in the final taste of your rich Chocolate Peanut Butter Dream.
- Ensure your cookie crumb base is pressed in really firmly. This prevents the layers from crumbling apart when you slice them.
- Don’t rush the chilling times! Proper chilling between layers is key to achieving that beautiful, distinct layering that makes these bars so appealing.
- For the smoothest peanut butter filling, make sure your peanut butter is at room temperature and that you sift your powdered sugar to avoid lumps.
What’s the secret to perfect Chocolate Peanut Butter Dream Bars?
The real secret to a perfect creamy Chocolate Peanut Butter Dream is patience with the chilling steps. Each layer needs to set completely before you add the next, ensuring clean lines and a stable bar that won’t smudge. For more baking inspiration, check out our recipes.
Can I make Chocolate Peanut Butter Dream Bars ahead of time?
Absolutely! You can prepare the entire batch of Chocolate Peanut Butter Dream bars up to 24 hours in advance and keep them refrigerated. This makes them perfect for parties or when you need a dessert ready to go. If you’re looking for other make-ahead desserts, consider our Romanian fried meatballs.
How do I avoid common mistakes with Chocolate Peanut Butter Dream Bars?
A common pitfall is not chilling the layers long enough, leading to smudged bars. Also, over-microwaving the chocolate can cause it to seize. Always use short intervals and stir frequently for a smooth melt. For tips on ingredient sourcing, you might find information on food ingredients helpful.
Best Ways to Serve Chocolate Peanut Butter Dream Bars
These decadent bars are fantastic on their own, but serving them up with a few thoughtful pairings can really elevate your Chocolate Peanut Butter Dream dessert experience. For a simple yet satisfying treat, enjoy one with a cold glass of milk – it’s a classic combo for a reason! If you’re serving them at a gathering, consider offering a scoop of vanilla bean ice cream alongside. The cool creaminess of the ice cream is the perfect contrast to the rich chocolate and peanut butter. For a more refined approach, a small dusting of cocoa powder or a drizzle of extra melted chocolate makes these bars look extra special and truly showcases their status as a delicious Chocolate Peanut Butter Dream dessert. You might also enjoy our chicken meatballs with lemon orzo for another delightful meal.
Nutrition Facts for Chocolate Peanut Butter Dream Bars
Here’s a breakdown of what you can expect in each delightful bar of this rich Chocolate Peanut Butter Dream. Remember, these are estimates, as ingredient brands and exact measurements can slightly alter the final numbers for your Chocolate Peanut Butter Dream dessert. For more information on nutritional values, you can consult resources like the USDA FoodData Central.
- Calories: 350
- Fat: 20g
- Saturated Fat: 10g
- Protein: 5g
- Carbohydrates: 40g
- Fiber: 3g
- Sugar: 30g
- Sodium: 150mg
Nutritional values are estimates and may vary based on specific ingredients used for your easy Chocolate Peanut Butter Dream.
How to Store and Reheat Chocolate Peanut Butter Dream Bars
Once your amazing Chocolate Peanut Butter Dream bars have cooled and been sliced, proper storage is key to keeping them tasting fresh. I always let them cool completely at room temperature before tucking them away. For the best quality, store them in an airtight container in the refrigerator. They’ll keep wonderfully for about 3 to 4 days, making them a perfect make-ahead Chocolate Peanut Butter Dream dessert. If you want to keep these delightful treats even longer, you can absolutely freeze them! Wrap individual bars tightly in plastic wrap, then in foil, and store them in a freezer-safe bag or container for up to 3 months. When you’re ready to enjoy them again, simply thaw them overnight in the refrigerator. No reheating is typically necessary, as they are best served chilled, but if you prefer them slightly softer, you can let them sit at room temperature for about 10-15 minutes before digging in. For other dessert ideas, consider our zucchini noodle chicken alfredo.
Frequently Asked Questions About Chocolate Peanut Butter Dream Bars
Can I substitute the chocolate chip cookies?
Yes, you can! For an easy Chocolate Peanut Butter Dream variation, try using graham cracker crumbs or even crushed pretzels for a sweet and salty twist. You’ll want about 1.5 cups of crumbs mixed with the melted butter.
What if I don’t have creamy peanut butter?
Crunchy peanut butter works too! It will add a little texture to the filling, which is quite nice. Just make sure it’s a standard peanut butter, not a natural one where the oil separates easily, as that might affect the consistency of your easy Chocolate Peanut Butter Dream bars.
How do I get clean cuts on the bars?
The trick to clean cuts for your Chocolate Peanut Butter Dream dessert is a hot knife. Heat a sharp knife under hot running water, wipe it dry, and then slice. Repeat this between each cut. This helps the chocolate melt slightly and prevents the layers from cracking or smearing. For more kitchen tips, you can visit the Food Network kitchen tips.
Can I make these Chocolate Peanut Butter Dream bars vegan?
You certainly can adapt this recipe to be vegan! Use vegan chocolate chip cookies, vegan butter, and vegan chocolate chips. Ensure your peanut butter and powdered sugar are also vegan-certified. This easy Chocolate Peanut Butter Dream modification is perfect for plant-based eaters.
Variations of Chocolate Peanut Butter Dream Bars You Can Try
Once you’ve mastered the classic, don’t be afraid to get creative with your Chocolate Peanut Butter Dream bars! These simple tweaks can transform them into something entirely new. For a delightful Chocolate Peanut Butter Dream no-bake option, skip the crust baking step and press it firmly into the pan, then chill it thoroughly before adding the chocolate layer. You can also experiment with different types of chocolate, like dark chocolate or white chocolate, for a new flavor profile. For a richer experience, try adding a tablespoon of espresso powder to the chocolate layers or a pinch of sea salt on top right before the final chocolate layer sets to enhance that decadent taste. These variations make your Chocolate Peanut Butter Dream dessert uniquely yours! Consider trying our jalapeno buffalo chicken casserole for a different flavor profile.
PrintChocolate Peanut Butter Dream: 10 Heavenly Bars
Indulge in these Chocolate Peanut Butter Dream Bars, a delightful dessert that perfectly balances rich chocolate with creamy peanut butter. Easy to make, these bars are perfect for any occasion.
- Prep Time: 20 minutes
- Cook Time: 10 minutes
- Total Time: 2 hours 20 minutes
- Yield: 10 bars 1x
- Category: Dessert Bars
- Method: Baking and Chilling
- Cuisine: American
- Diet: Vegetarian
Ingredients
- 8 large chocolate chip cookies (about 5 inches across)
- 5 tablespoons melted butter
- 3/4 cup creamy peanut butter
- 1 1/2 cups powdered sugar
- 12 ounces semi-sweet chocolate chips (or milk chocolate chips)
Instructions
- Preheat your oven to 350°F.
- Crumble the cookies into fine crumbs in a medium mixing bowl and combine thoroughly with melted butter.
- Press the cookie mixture firmly and evenly into a 9×9 inch pan, ensuring complete coverage.
- Bake for 10 minutes, or until edges are firm. Allow to cool on the counter for 10 minutes.
- Refrigerate the crust for one hour until completely cooled and set.
- Melt half the chocolate chips in 30-second intervals in the microwave, stirring between each interval until smooth.
- Spread melted chocolate evenly over the chilled crust and return to the refrigerator for 15-20 minutes until firm.
- While the chocolate sets, mix peanut butter and powdered sugar until well combined and smooth.
- Carefully spread the peanut butter mixture over the hardened chocolate layer.
- Melt the remaining chocolate and spread over the peanut butter layer.
- Allow bars to set completely in the refrigerator before cutting into 10 equal pieces.
Notes
- Store remaining bars in an airtight container in the refrigerator for up to one week.
- For best results, ensure ingredients like peanut butter and chocolate are of high quality.
- Use a sharp knife dipped in hot water and wiped clean between cuts for clean slices.
- Room temperature ingredients help achieve a smoother texture.
- Proper chilling between layers prevents them from mixing.
Nutrition
- Serving Size: 1 bar
